Finally fall is here, the season I always look forward to….

I am roaming around with my camera to take all the breath taking shots of nature attired in its most vibrant red and yellow colored gown. I lack words when it comes to admiring the beauty of nature in fall: it’s stunning, mind-boggling and hallucinatory. Besides enjoying the nature, the other thing I love about fall is that, this is the season of pumpkins. All we can see is pumpkins now; at grocery stores, carved at the doorsteps of almost all houses, decorative pumpkins etc etc.
When everyone is busy carving up pumpkins for their doorstep, I thought I might as well do something with the pumpkin in my kitchen. The first thing that came to my mind was the mouthwatering pumpkin pie.
Pumpkins are packed with Vitamin A and offer a mild, sweet flavor in many recipes. There are countless recipes that call for pumpkin: pancakes, muffins, cakes, soups, stews or chili. But the classic pumpkin dish is always pumpkin pie.
I couldn’t wait any longer to make the pumpkin pie, so yesterday I did this, all from scratch. In fact, I made the pie crust from scratch as well. Making pie crust from scratch is definitely challenging, but when you do it with all your heart you could never go wrong. I did it with all passion and it came out pretty good. I am going to post the step by step method of preparing the pie crust from scratch and the pumpkin filling for the pie. When you read the method you would be surprised to see how easy and fast it is to make the crust, of course it needs to be chilled in the refrigerator for few hours.
So get ready to welcome the most amazing fall with homemade pumpkin pie.
Making the Pie crust:
A good pie is all about the crust. Creamy rich European butter is the best butter to use. It has a higher fat content than American butters, so it’s tastier and more supple to work with.
Making the crust in the old-fashioned way – by hand, rubbing cold chunks of butter between the fingers and into the flour definitely beats those made using pastry blender or food processor.
Ingredients for pie crust:
This pie dough can be made ahead and refrigerated overnight or frozen for up to 3 months.
For making 9-inch piecrust:
- Unbleached all-purpose flour- 1 1/3 cups
- Granulated sugar- 1tsp
- Salt- a pinch
- Cold, unsalted butter, preferably European style, cut into 3/4-inch pieces-4 oz (8Tbsp)
- Ice water- 3-4 tbsp
- Pie plate- 9 inch plate
Get ready for having some fun:
Making the Dough:
- Put the flour, sugar and salt in a medium bowl and stir with a fork to combine.
- Add the butter to the bowl. Rub the cold chunks of butter between the fingertips, smearing the butter into the flour to create small flakes of fat.
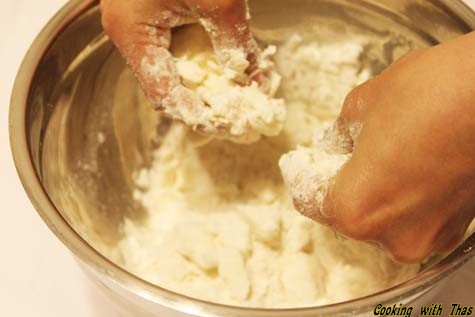
- Drizzle 3 tbsp of ice water over the flour , stir with fork, until the mixture forms a shaggy dough that’s moist enough to hold together when pressed between the fingers.
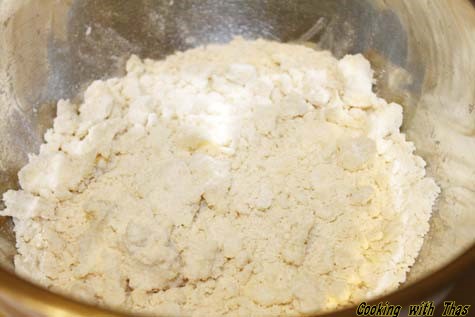
- Gently gather and press the dough together, and from it into a disk with smooth edges.
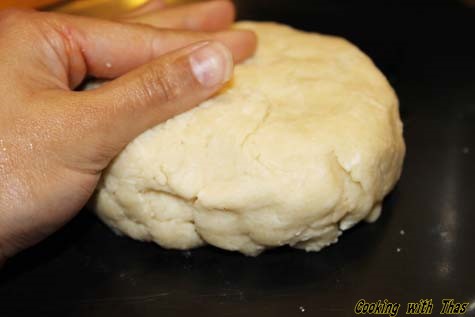
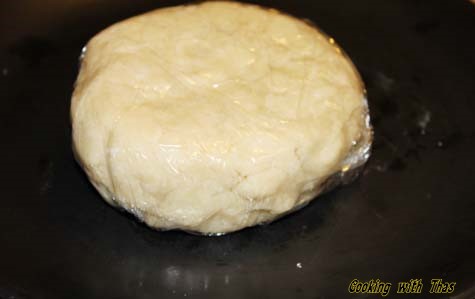
- Wrap the dough in plastic and chill for at least 1 hour, but preferably 2 to 4 hours, before rolling.
Roll the Dough:
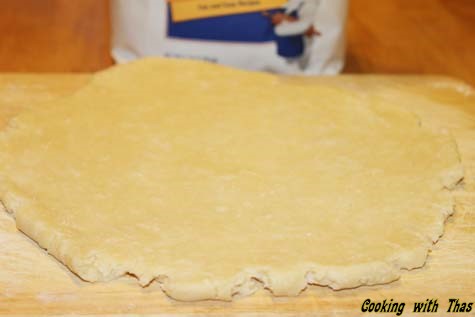
- Let the chilled dough sit at room temperature to soften slightly-it should be cold and firm but not rock hard.
- Depending upon how long the dough was chilled, it could take 5-20 minutes.
- When ready to flour, lightly flour the counter top or other surface and start rolling the pin from the center of the dough to outside, in circular motion.
- Roll aorund the dough until the dough is 13 to 14 inches in diameter and about 1/8 inch thick.
- Check that dough isn’t sticking by lifting it with a flat spatula.
- Do not add too much flour while rolling, as it makes a drier and tougher crust.
To line the pie plate:
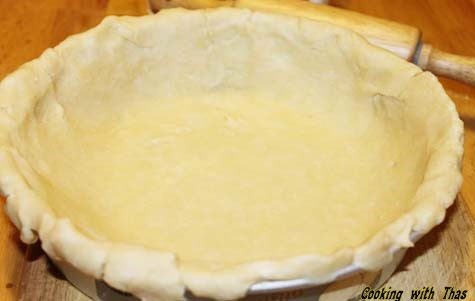
- Gently transfer the dough to a 9-inch pie plate., by folding it in half and unfolding it into the plate.
- Do not stretch the dough as you line the pan, or it will spring back when baked.
- Gently lift the outer edges of the dough and line on the sides of the pan without stretching the dough.
- Trim the overhanging dough to 1 inch from the edge of the pan. Roll the dough under itself into a cylinder that rests on the edge of the pan.
- You can give the edges a decorative look by pressing the index finger on the dough.
- Prick the sides and bottom of the crust all over with a fork.
- Refrigerate until firm, about 1 hour or overnight. This will relax the dough and help prevent the edges from caving in.
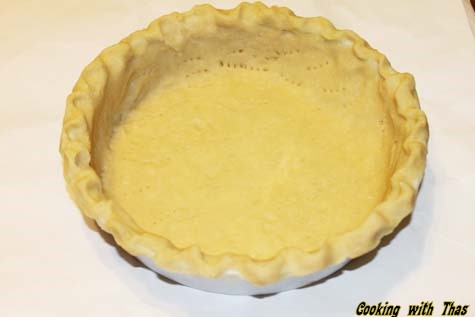
Blind bake the crust:
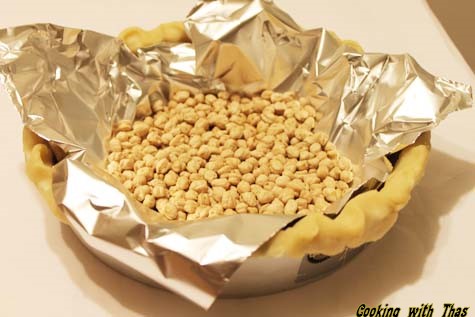
- keep the rack in the center of the oven and preheat the oven to 425F. Line the chilled piecrust with foil and fill it with dried beans or pie weights. Bake for 15 minutes; remove the foil and the beans or weights. Reduce the oven temperature to 375F.
- Bake until the bottom looks dry but is not quite done and the edges are light golden, 5 or 7 minutes more.
- Let it cool on a rack while you prepare the pumpkin filling.
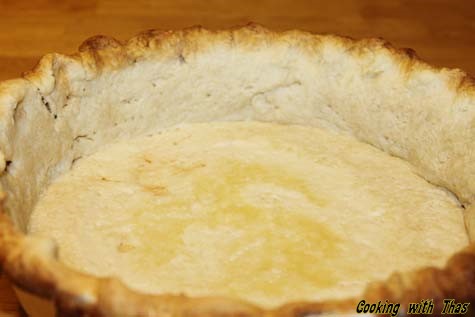
Pumpkin Filling:
Ingredients:
- Pumpkin puree- 15-oz can or make fresh puree.
- Unsweetened coconut milk-1 1/4 cups
- Light brown sugar-3/4 cup
- Ground ginger-1tsp
- Ground cinnamon-3/4 tsp
- Salt-1/2 tsp
- Freshly grated nutmeg-1/8 tsp
- Large eggs, at room temperature-3
- Baked piecrust -1
Preparation:
- Position the rack in the center of the oven, set a heavy duty rimmed baking sheet on the rack, and preheat the oven to 425F.
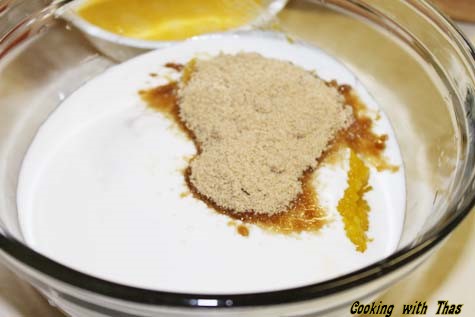
- In a large bowl, whisk the pumpkin puree, coconut milk, sugar, ginger, cinnamon, salt and nutmeg until smooth.
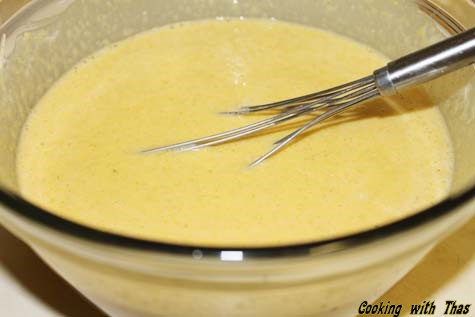
- Whisk in the eggs, until the mixture is smooth.
- Pour the filling into the piecrust.
- Put the pie on the heated baking sheet.
- Bake for 10 minutes and then reduce the oven temperature to 350F.
- Bake for 45-55 minutes or until the center of the pie is stiff.
- Cool completely before serving.
- This pie can be stored at room temperature for up to 2 days.
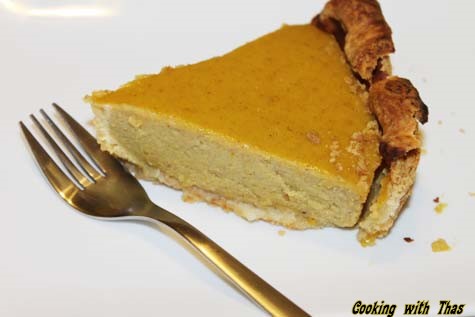
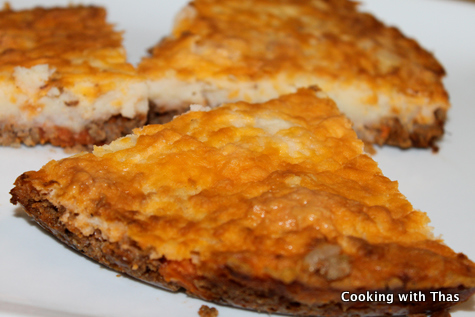
Voila, homemade pumpkin pie right from the oven…
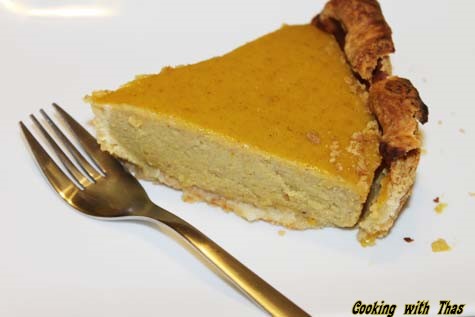
Your house will be filled with the mesmerizing aroma of pumpkin pie.
Tips:
- Why Blind Bake: Blind baking gives the crust a head start, allowing it to firm up before filling is added. This prevents the crust from getting soggy. Dried beans or pie weights help it keep its shape.
- Don’t be tempted to skip chiling the crust before blind baking it.
- You can substitute pumpkin spice for ground ginger, cinnamon and nutmeg.
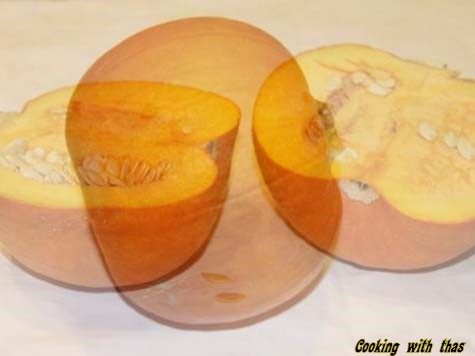
- To make fresh pumpkin puree: Clean and cut the ripe pumpkin, boil in water until it is tender drain it in a colander and puree it in the blender. You could freeze any excess puree for future use.
- Don’t worry if the edges of the pie gets over browned, it tastes good too.
The Verdict: 😉

- Unbleached all-purpose flour- 1⅓ cups
- Granulated sugar- 1tsp
- Salt- a pinch
- Cold, unsalted butter, preferably European style, cut into ¾-inch pieces-4 oz (8Tbsp)
- Ice water- 3-4 tbsp
- Pie plate- 9 inch plate
- Pumpkin puree- 15-oz can or make fresh puree.
- Unsweetened coconut milk-1¼ cups
- Light brown sugar-3/4 cup
- Ground ginger-1tsp
- Ground cinnamon-3/4 tsp
- Salt-1/2 tsp
- Freshly grated nutmeg-1/8 tsp
- Large eggs, at room temperature-3
- Baked piecrust -1
- Put the flour, sugar and salt in a medium bowl and stir with a fork to combine.
- Add the butter to the bowl. Rub the cold chunks of butter between the fingertips, smearing the butter into the flour to create small flakes of fat.
- Drizzle 3 tbsp of ice water over the flour , stir with fork, until the mixture forms a shaggy dough that's moist enough to hold together when pressed between the fingers.
- Gently gather and press the dough together, and from it into a disk with smooth edges.
- Wrap the dough in plastic and chill for at least 1 hour, but preferably 2 to 4 hours, before rolling.
- Let the chilled dough sit at room temperature to soften slightly-it should be cold and firm but not rock hard.
- Depending upon how long the dough was chilled, it could take 5-20 minutes.
- When ready to flour, lightly flour the counter top or other surface and start rolling the pin from the center of the dough to outside, in circular motion.
- Roll aorund the dough until the dough is 13 to 14 inches in diameter and about ⅛ inch thick.
- Check that dough isn't sticking by lifting it with a flat spatula.
- Do not add too much flour while rolling, as it makes a drier and tougher crust.
- Gently transfer the dough to a 9-inch pie plate., by folding it in half and unfolding it into the plate.
- Do not stretch the dough as you line the pan, or it will spring back when baked.
- Gently lift the outer edges of the dough and line on the sides of the pan without stretching the dough.
- Trim the overhanging dough to 1 inch from the edge of the pan. Roll the dough under itself into a cylinder that rests on the edge of the pan.
- You can give the edges a decorative look by pressing the index finger on the dough.
- Prick the sides and bottom of the crust all over with a fork.
- Refrigerate until firm, about 1 hour or overnight. This will relax the dough and help prevent the edges from caving in.
- keep the rack in the center of the oven and preheat the oven to 425F. Line the chilled piecrust with foil and fill it with dried beans or pie weights. Bake for 15 minutes; remove the foil and the beans or weights. Reduce the oven temperature to 375F.
- Bake until the bottom looks dry but is not quite done and the edges are light golden, 5 or 7 minutes more.
- Let it cool on a rack while you prepare the pumpkin filling.
- Position the rack in the center of the oven, set a heavy duty rimmed baking sheet on the rack, and preheat the oven to 425F.
- In a large bowl, whisk the pumpkin puree, coconut milk, sugar, ginger, cinnamon, salt and nutmeg until smooth.
- Whisk in the eggs, until the mixture is smooth.
- Pour the filling into the piecrust.
- Put the pie on the heated baking sheet.
- Bake for 10 minutes and then reduce the oven temperature to 350F.
- Bake for 45-55 minutes or until the center of the pie is stiff.
- Cool completely before serving.
- This pie can be stored at room temperature for up to 2 days.
Don't be tempted to skip chiling the crust before blind baking it.
You can substitute pumpkin spice for ground ginger, cinnamon and nutmeg.
To make fresh pumpkin puree: Clean and cut the ripe pumpkin, boil in water until it is tender drain it in a colander and puree it in the blender. You could freeze any excess puree for future use.
Don't worry if the edges of the pie gets over browned, it tastes good too.
