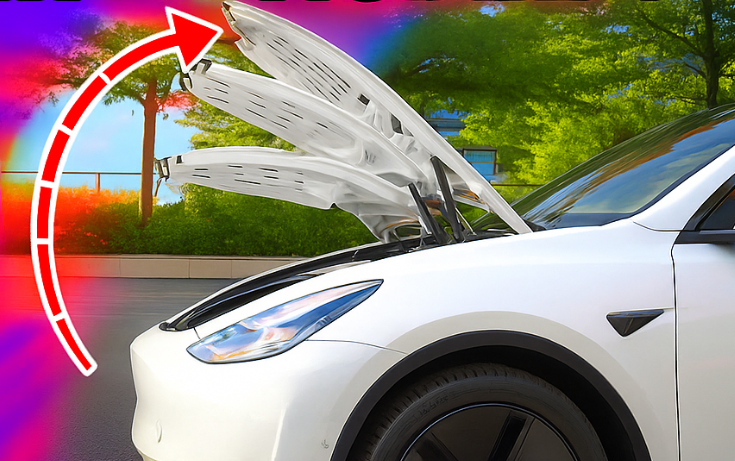
Hansshow Power Frunk Installation Guide – Tesla Model Y
Detailed Installation Video
Use my Code Thas & SAVE 22% on all Hansshow products.
 Tools Required
- 10mm socket wrench
- 13mm wrench
- 5mm hex key (with mini ratchet recommended)
- Flathead screwdriver (for prying)
- Pick tool (for detaching original struts)
- Zip ties (10–15 recommended)
Preparation
- Open the frunk and remove the top trim piece above the frunk. Just pull gently from different areas — it snaps off.
- Pry off the emergency release button cover using a flathead screwdriver.
- Remove the frunk tub using a 10mm socket wrench (4 bolts).
- Remove the HEPA filter using a 10mm socket wrench (2 bolts).
1. Replace the Struts
- Use a 13mm wrench to loosen and remove the factory struts.
- Use a pick tool to release the retaining clip on the strut hook.
- Install the new power strut brackets and secure them using a 5mm hex key with a mini ratchet.
- Attach the new struts (they’re interchangeable—no left/right orientation).
- Estimated Time: 1–2 hours
2. Upgrade the Latch
- Remove the existing latch using a 10mm socket wrench (2 bolts).
- Install the upgraded latch with the electric motor components.
- Reattach it, ensuring the center alignment is correct.
- Estimated Time: 30–45 minutes
3. Wiring
- The connectors are foolproof — they only plug in one way.
- Double-check that all wires are connected with no loose ends.
- Follow the wiring diagram/video for your version (labels may vary).
- Route the emergency pull cable to the tow hook compartment.
- Connect:
B+to the positive terminal of the 12V batteryGNDto a nearby ground bolt
- Estimated Time: 30–45 minutes
4. Organize and Tie
- Secure the electric motor in a safe location using 2 zip ties.
- Do the same for the controller module.
- Organize and bundle all wiring neatly with additional zip ties.
- Make sure no cables are in the way of moving parts or heat sources.
- Estimated Time: 10–20 minutes
5. Testing
- Test both the power open and close functions.
- If the latch alignment is off, adjust by:
- Loosening the 2x 10mm bolts
- Moving the latch up, down, left, or right
- Retightening once aligned
- Estimated Time: 10 minutes
6. Finishing Up
- Reinstall the HEPA filter (10mm, 2 bolts)
- Reinstall the frunk tub (10mm, 4 bolts)
- Reattach the top trim piece
- Snap the emergency release cover back into place
- Create a Siri Shortcut:
- Set it to “Close Frunk” using the “Open Frunk” command (works when the frunk is already open)
- Estimated Time: 15–30 minutes
 Total Estimated Installation Time:
2 hours 35 minutes – 4 hours 20 minutes
Frequently asked questions (FAQ):
1. How does the emergency pull cord work?
The emergency pull cord is designed to manually release only the Hansshow aftermarket lock. Your Tesla’s frunk has two locks after installation:
- The original factory lock
- The Hansshow Power Frunk lock
When you use the Tesla app or the in-car screen to open the frunk, both locks are released electronically.
However, if you pull the emergency release cord, it will only disengage the Hansshow lock. The factory lock remains engaged, which means the frunk will not open unless both locks are released.
In short:
- Emergency pull = releases Hansshow lock only
- App or screen = releases both locks together
2. How to open the power frunk if the 12v battery is dead?
Both the factory and Hansshow frunk locks draw power from the vehicle’s 12V battery. If the battery is dead, the frunk cannot be opened electrically. Follow these steps to access the frunk:
-
Power the Frunk Latch: Connect a 9V battery to the tow hook compartment terminals to release the frunk latches. For some vehicle models, a 12V jump starter may provide a more reliable power source.
-
Open the Frunk: Once the latches are released, lift the frunk to access the battery compartment.
-
Replace the Battery: Replace the dead 12V battery with a new one to restore normal operation.
Note: Ensure proper polarity when connecting the battery or jump starter to avoid damage to the vehicle’s electrical system.
Use my Code Thas & SAVE 22% on all Hansshow products.


