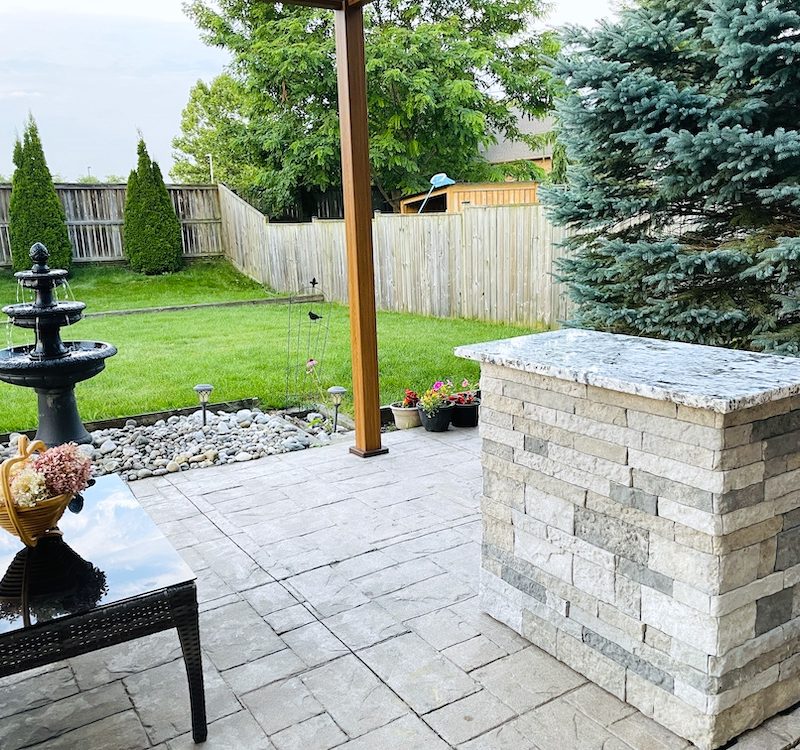
Creating a beautiful and functional outdoor kitchen has always been a dream project for my husband and me. We wanted a space that not only serves as a cooking area but also enhances the aesthetic appeal of our backyard. After some research, we decided to build a luxurious DIY outdoor kitchen island using a granite countertop and AirStone, an ultra-light product from airstone.com.
The result? A stunning outdoor kitchen island that looks like it was professionally done, but with the pride of knowing we built it ourselves.
Materials Required
- One, 4×4 pressure treated lumber
- Two, 2×4 lumber for the top frame and leg supports
- Metal post base brackets (Buy On Amazon)
- AirStone (Buy On airstone.com)
- Cement board
- 3X PL construction adhesive (Buy On Amazon)
- Jigsaw (Buy On Amazon)
- Carbide Jigsaw blade (Buy On Amazon)
- Instead of Jigsaw, Hacksaw can be used (Buy On Amazon), Carbide Hacksaw blade (Buy On Amazon)
- Brackets for added strength and stability
- Screws and bolts
- Level, square, and plumb line
- Large stainless steel door for storage (Buy On Amazon)
- Granite Countertop

Step-by-Step Build Process
1. Building the Frame
We started by constructing the frame of our luxurious kitchen island. Using 4×4 posts for the legs, we attached them to metal post base brackets anchored to our stamped concrete patio. This ensured a strong and stable foundation. Next, we connected the posts with 2x4s to form the top frame and added additional 2×4 supports between the legs for extra stability. Making sure the frame was plumb, level, and square was crucial to ensure everything would fit together perfectly.
2. Adding the Cement Board
With the frame complete, we attached cement boards to the sides and front. The cement board serves as a base for the AirStone, providing a solid surface for adhesion. We used screws to secure the boards, making sure they were tightly fastened to the frame.
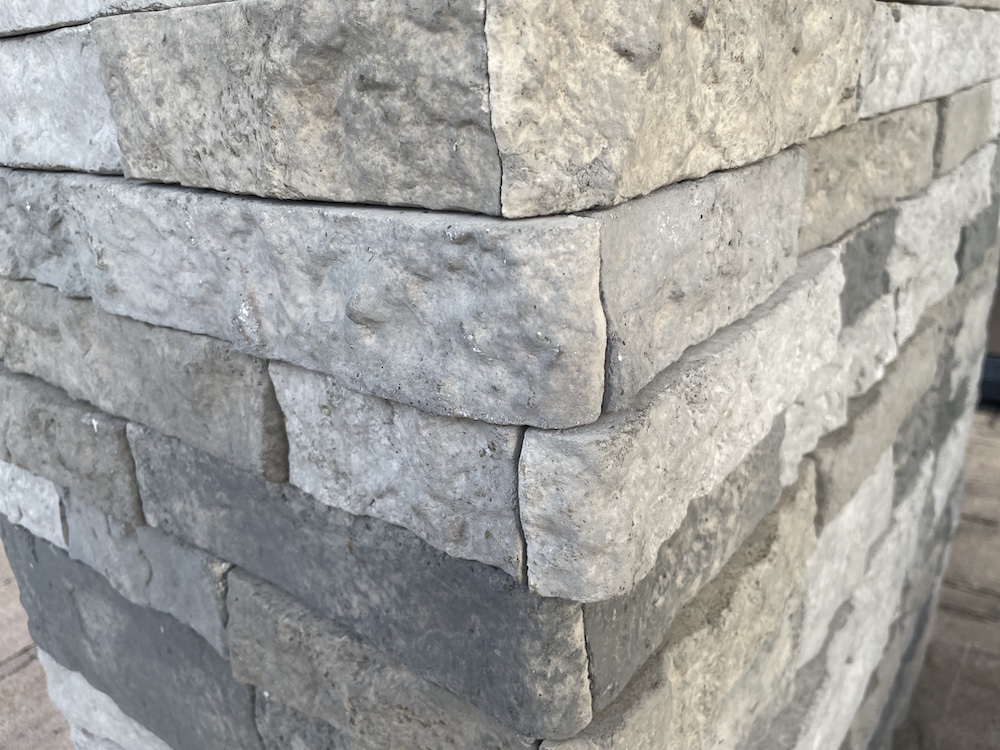
3. Cutting and Applying AirStone
Cutting the AirStone was surprisingly easy. We used a jigsaw equipped with a carbide saw blade, which made precise cuts without much effort. To adhere the AirStone to the cement board, we used 3X PL construction adhesive. This adhesive is incredibly strong and ensured that the stones would stay in place for years to come. We carefully applied the stones, pressing them firmly into the adhesive and making sure they were level and evenly spaced.
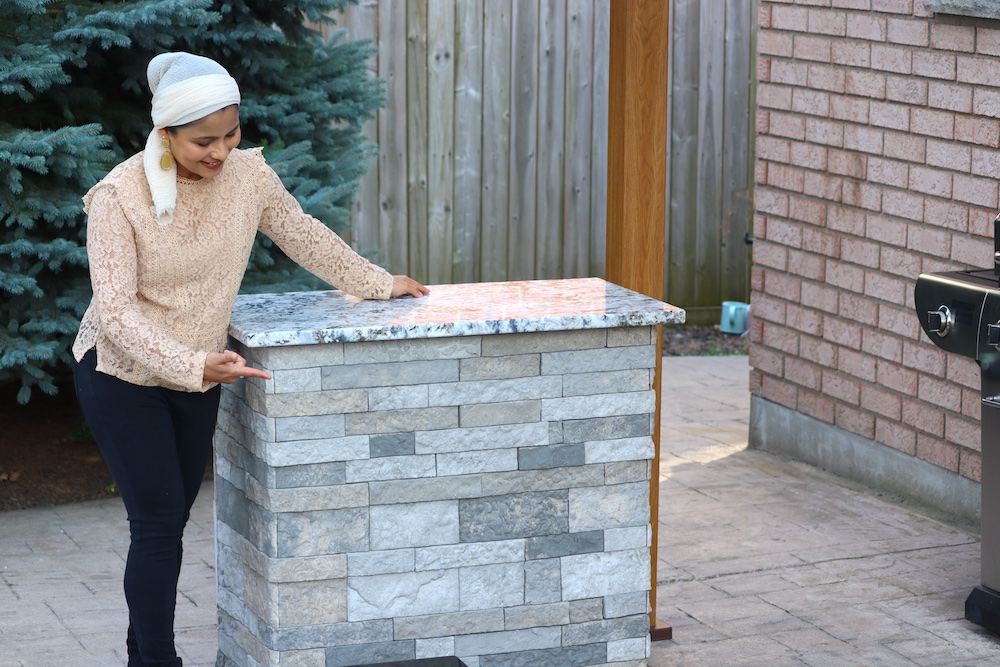
4. Installing the Granite Countertop
The final touch was the luxurious granite countertop. We chose granite for its durability and beautiful appearance. Placing the countertop on the frame, we secured it with adhesive and brackets to ensure it was firmly in place.
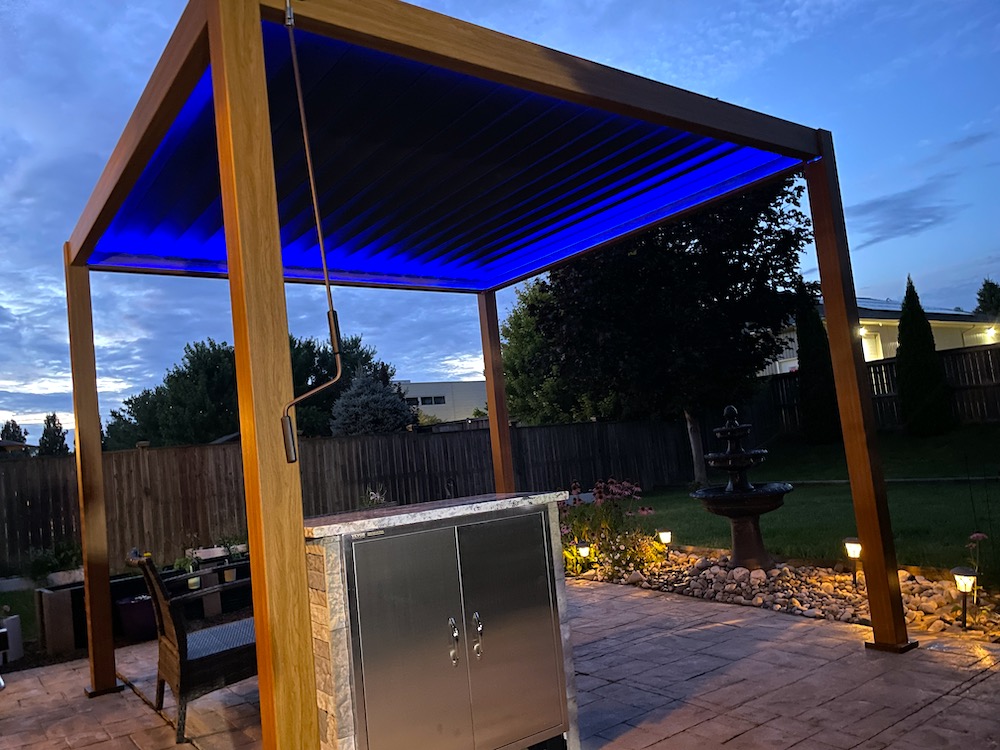
5. Adding the Stainless Steel Door
To enhance functionality, we added a large stainless steel door for storage inside the island. This was easy to install and provides a convenient space to store cooking utensils, propane tanks, or other outdoor kitchen essentials. The stainless steel door not only adds to the sleek look of the island but also offers practical storage solutions.

Our Experience
Building this luxurious outdoor kitchen island was a rewarding experience. Not only did we end up with a gorgeous addition to our backyard, but we also enjoyed the process of working together on a DIY project. The AirStone was a fantastic choice for this build. Its lightweight nature made it easy to handle, and its realistic stone appearance added a touch of elegance to our kitchen island. It’s available in 3 colors and we pickled Spring Creek color.
Why Choose AirStone?
AirStone is an excellent product for DIY projects like this. Here are a few reasons why we loved using it:
- Lightweight: AirStone is 75% lighter than real stone, making it easy to transport and work with.
- Realistic Appearance: It mimics the look and feel of natural stone, adding a luxurious touch to any project.
- Easy to Cut: With just a jigsaw and a carbide saw blade, cutting AirStone to size is simple and straightforward.
- Strong Adhesion: When paired with 3X PL construction adhesive, the stones adhere firmly to surfaces, ensuring longevity and durability.
Conclusion
Our luxurious DIY outdoor kitchen island has transformed our backyard into a beautiful and functional space. The combination of a granite countertop, AirStone, and a stainless steel storage door has created a stunning focal point that we are incredibly proud of. If you’re considering a similar project, we highly recommend using AirStone for its ease of use and elegant finish.
For a detailed look at our build process, check out the below YouTube video we created and the photos we took throughout the project. We hope our experience inspires you to start your own DIY journey and create something amazing in your backyard!